This is a quick post about a tool I made recently called Webhook Testing Tool (WTT). WTT is a self-hostable, open-source alternative to webhook testing sites like https://webhook.site.
Basically, once you set it up, you can send arbitrary HTTP requests to your WTT server instance and get a 200 response. Information about the requests — headers, bodies, etc. — is stored in a SQLite database and exposed for inspection via a (password-protected) HTML admin UI.
You can even construct dynamic response payloads, status codes, and headers on a per-route basis using JS responder scripts, configurable in the admin UI. (The scripts also live in the SQLite database.)
An example use-case is if you are building an app that sends outgoing webhook requests, and you want to see the exact contents of the request your app is sending. Or if you’re testing some CI/CD hook that sends outgoing HTTP requests and you want to see what the payloads look like.
The advantage of WTT is that it can be hosted in the cloud for a small fraction of the expense of a paid account on https://webhook.site.
The price of self-hosting WTT on Fly is between $0.30-$3.00 per month, depending on how frequently you send requests.
If you’re still under the limits of the Fly free tier, it’s completely free.
Deploying it yourself
Dependencies:
- flyctl and Fly account
First, clone the repo:
git clone https://github.com/luketurner/webhook-testing-tool.git
cd webhook-testing-tool
Then, launch your copy of the app. You’ll need to give it a unique name.
flyctl launch --no-deployBecause WTT persists data in a SQLite file, don’t provision a Postgres database when launching the app. We’ll set up a Fly volume to store the SQLite file in a minute.
Next, create a password for the admin account:
flyctl secrets set WTT_ADMIN_PASSWORD=yoursecretpasswordYou’ll be able to use this password to login to the /__admin UI once your app is deployed.
Next, we’ll create the volume to store our SQLite database. This is important because otherwise you’d lose all your request history and configuration whenever the app scales to zero.
flyctl volumes create -s 1 -r sea data We create the volume with -s 1 (1 GB size) to minimize cost. This volume will cost $0.15/mo. If you launched the app in a region other than sea, then adjust that when creating the volume.
There are already lines in the fly.toml to mount this volume in the /data directory of the app. No additional configuration is needed.
Now we’re ready to deploy:
flyctl deployOnce this is done, you can open https://your-app-name.fly.dev/__admin in a Web browser. You’ll be prompted for a username and password. The username is admin, the password is whatever you set in the WTT_ADMIN_PASSWORD secret above.
Once you log in, you’ll be presented with a screen like this:
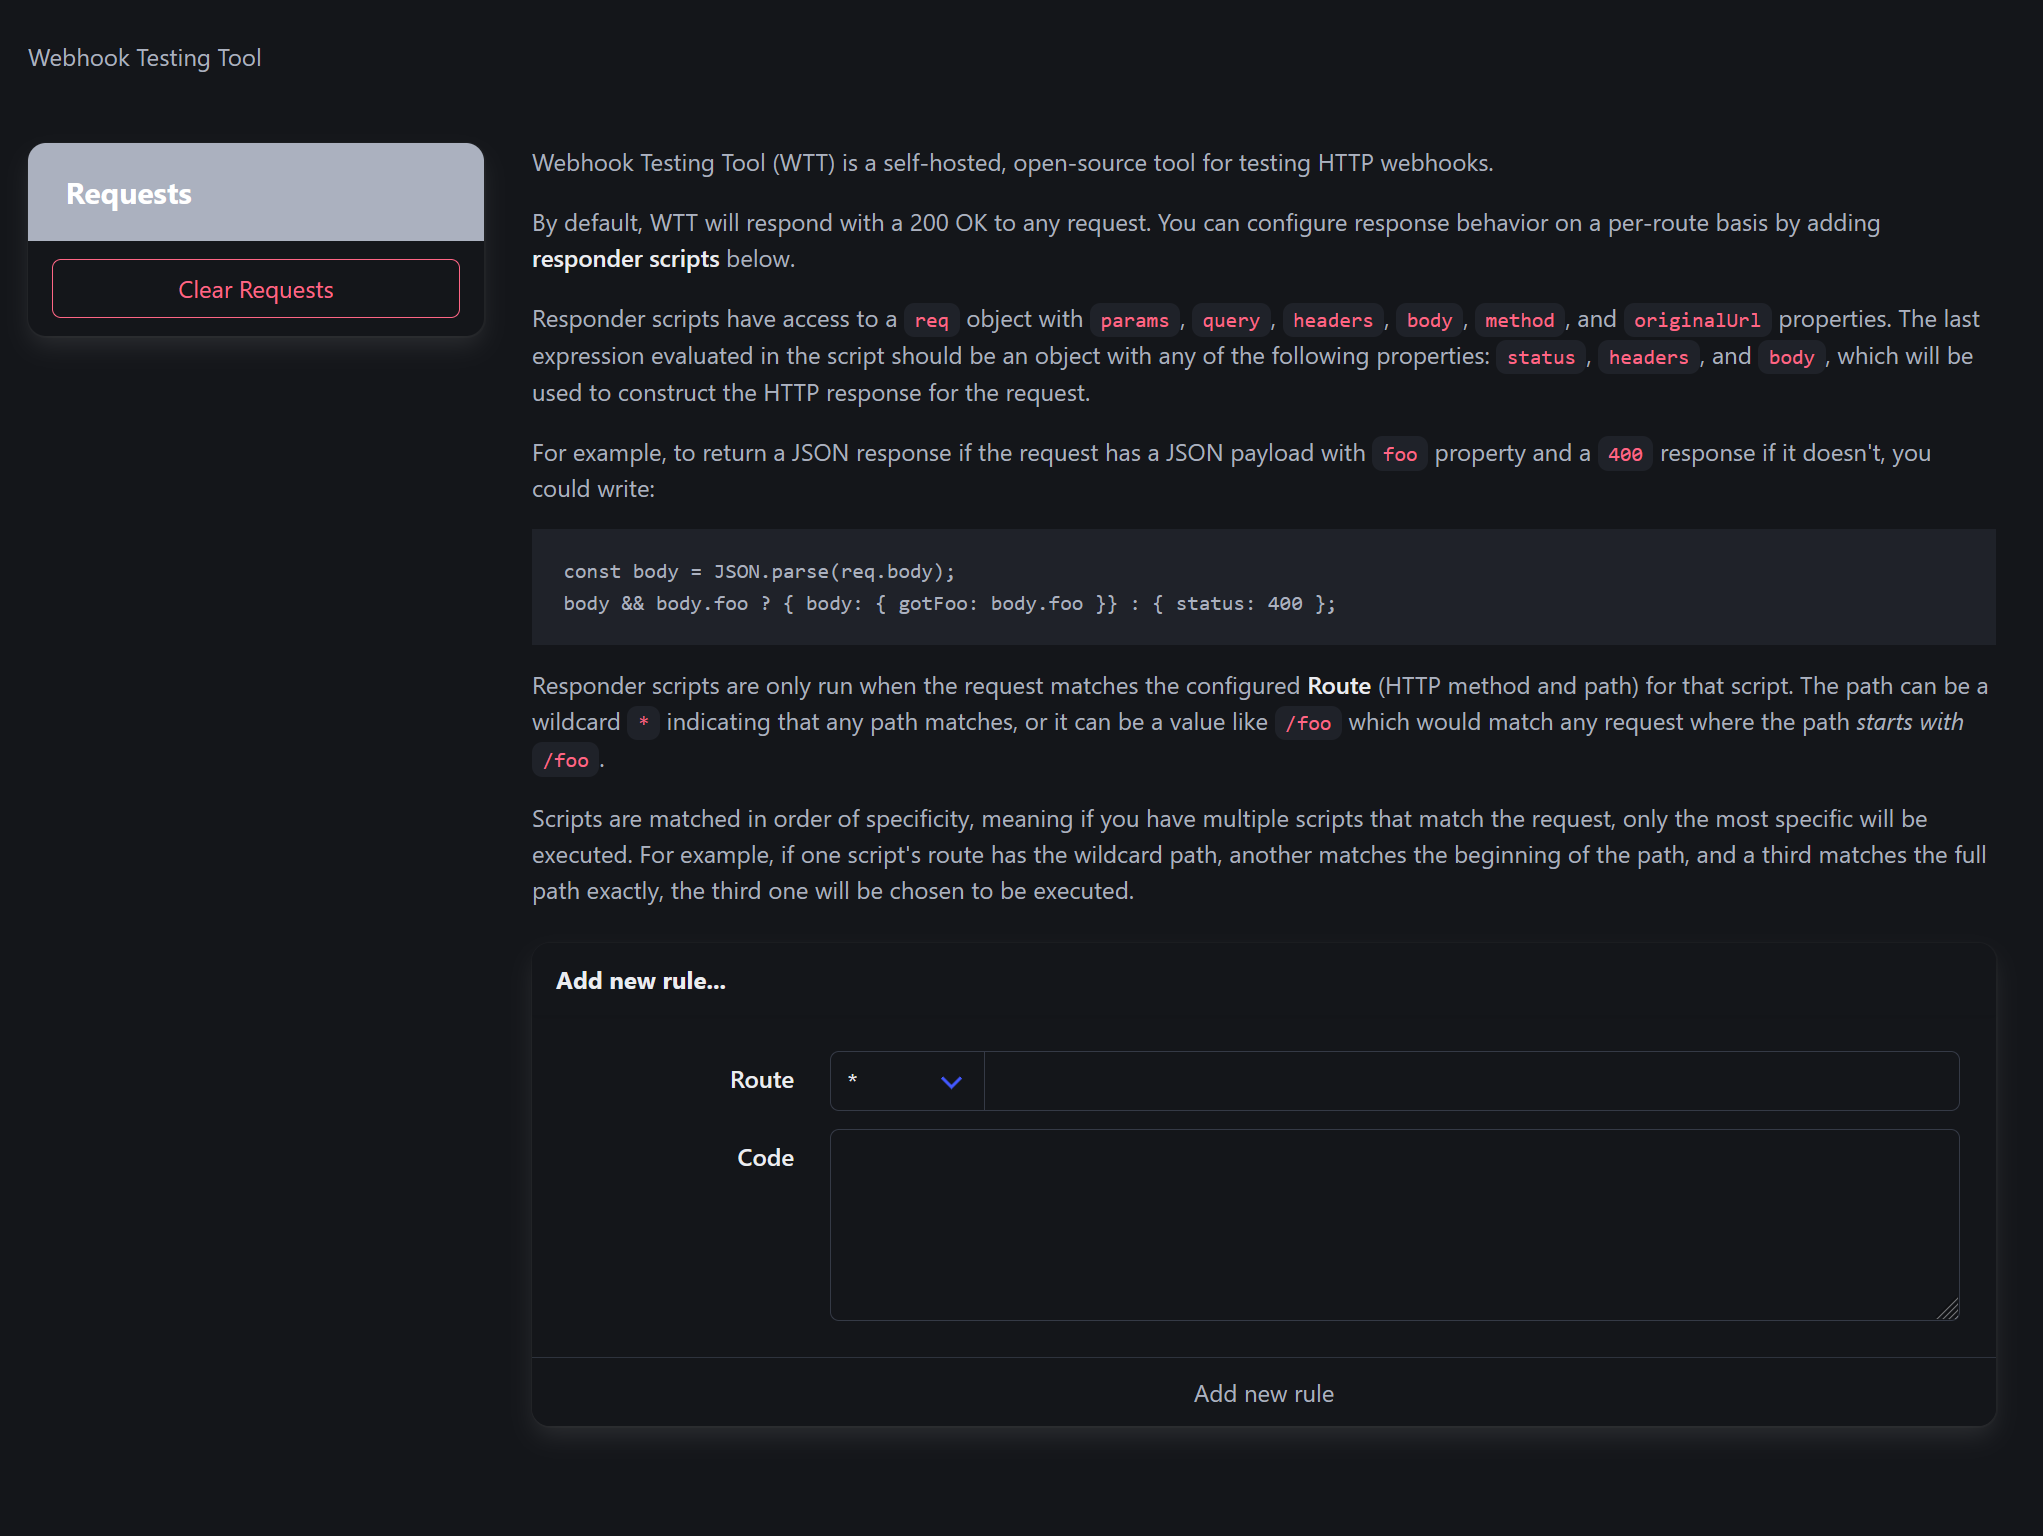
If you want, you can proceed to add one or more responder scripts, but it’s not required to use the app.
We’re ready to try sending a test request:
curl https://your-app-name.fly.dev/foobar \
-X POST \
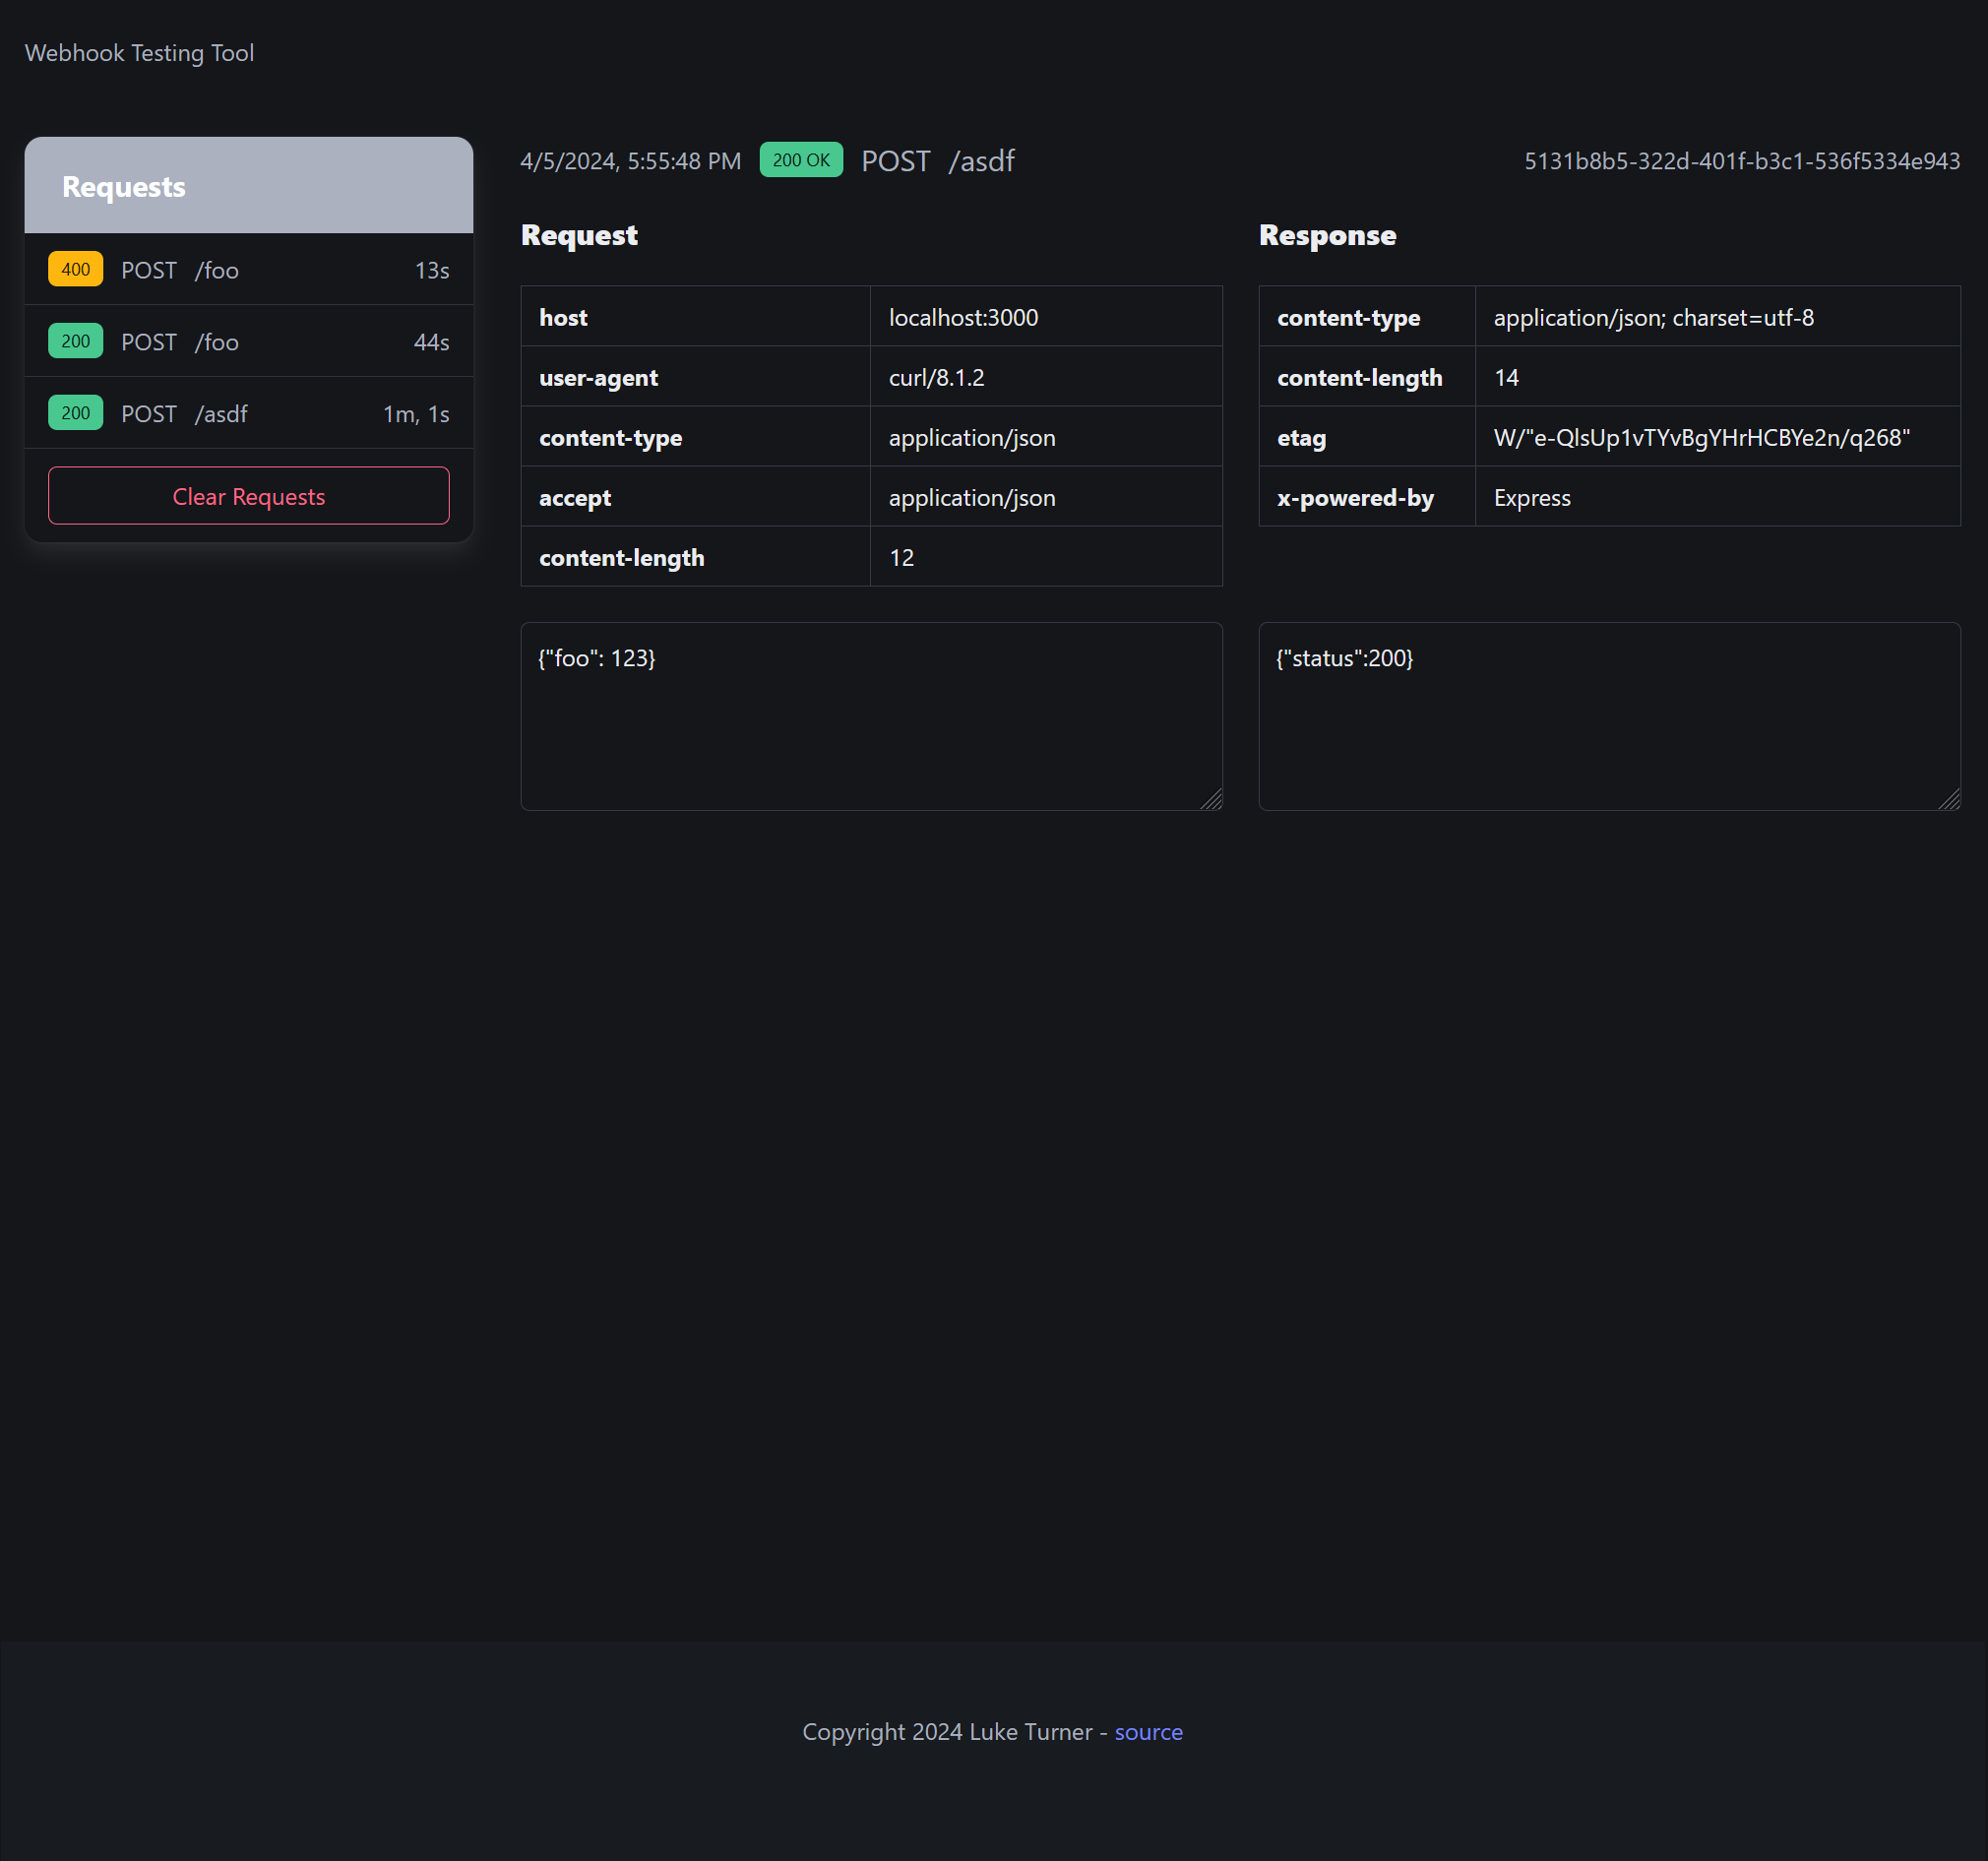
--json '{"hello": "world"}'Then refresh the page in your browser, and the request will appear in the sidenav. Click it to view details about the request. Tada!
See the README on Github for more information.
