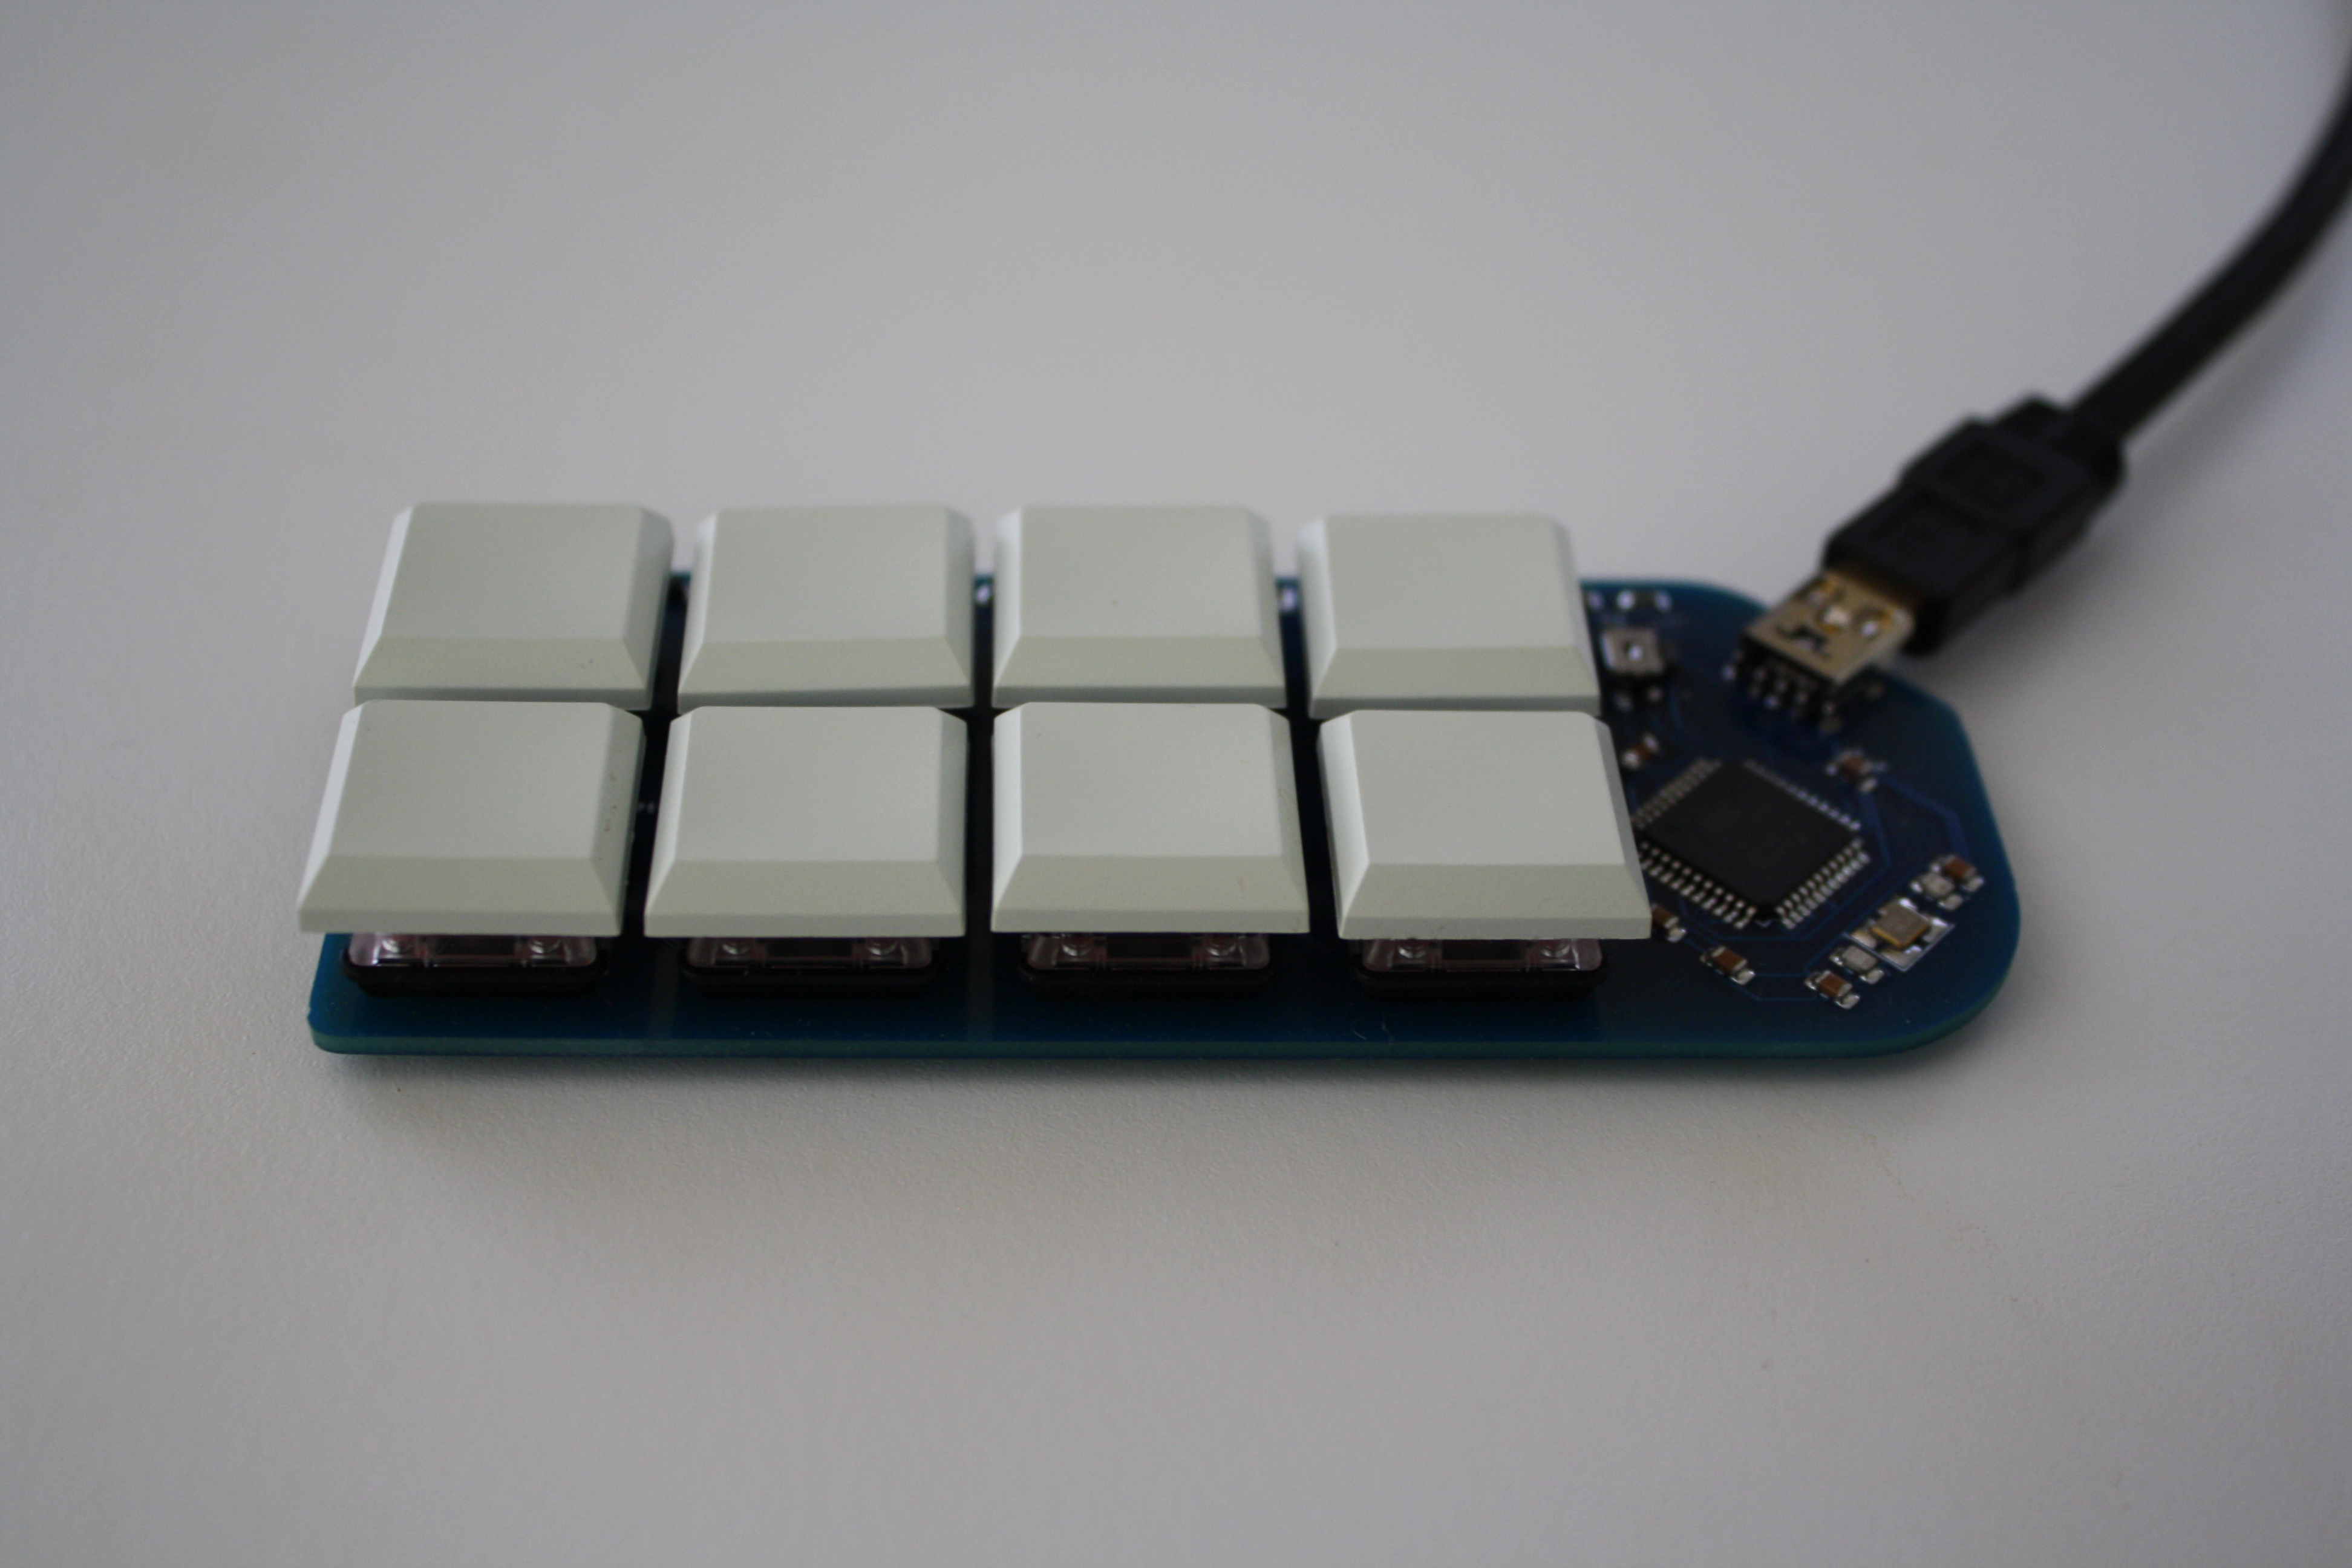
Figure 1: The Faunchpad. This particular one has 12g Crocs and was purchased preassembled. (view full size)
This is the Faunchpad, a small-but-mighty macropad from g Heavy Industries.1
It has eight low-profile buttons, designed for “chording” (multiple simultaneous button presses). Chording allows us to leverage eight buttons to define dozens or hundreds of separate macros!
The Faunchpad runs the open-source QMK Firmware, leveraging g Heavy Industries’ Combos library to define chorded macros. Consequently, the macros are baked into the firmware itself — the Faunchpad provides a totally plug-and-play experience, with no custom drivers needed.
The downside of this “macros-in-firmware” approach is that to change the macros, we have to compile and flash a customized firmware.
So, this post is a quick primer on how to customize the Faunchpad’s macros by flashing it with a customized firmware.
Understanding Firmware
First: what does it mean to “change the firmware?” What is firmware, anyway?
In short, firmware is software that operates at the lowest level of abstraction possible, which is to say it interacts directly with the hardware exposed by the physical structure of the device.
The Faunchpad’s firmware is executed in an ATmega32u4 microcontroller visible on the surface of the device. The datasheet describes the hardware interfaces that our firmware can use.
This particular microcontroller has 32 KB of flash memory that stores the machine code for the firmware. Of this, 4 KB is reserved for the USB bootloader firmware (more on that later.) This leaves us with 28 KB of space for our firmware.
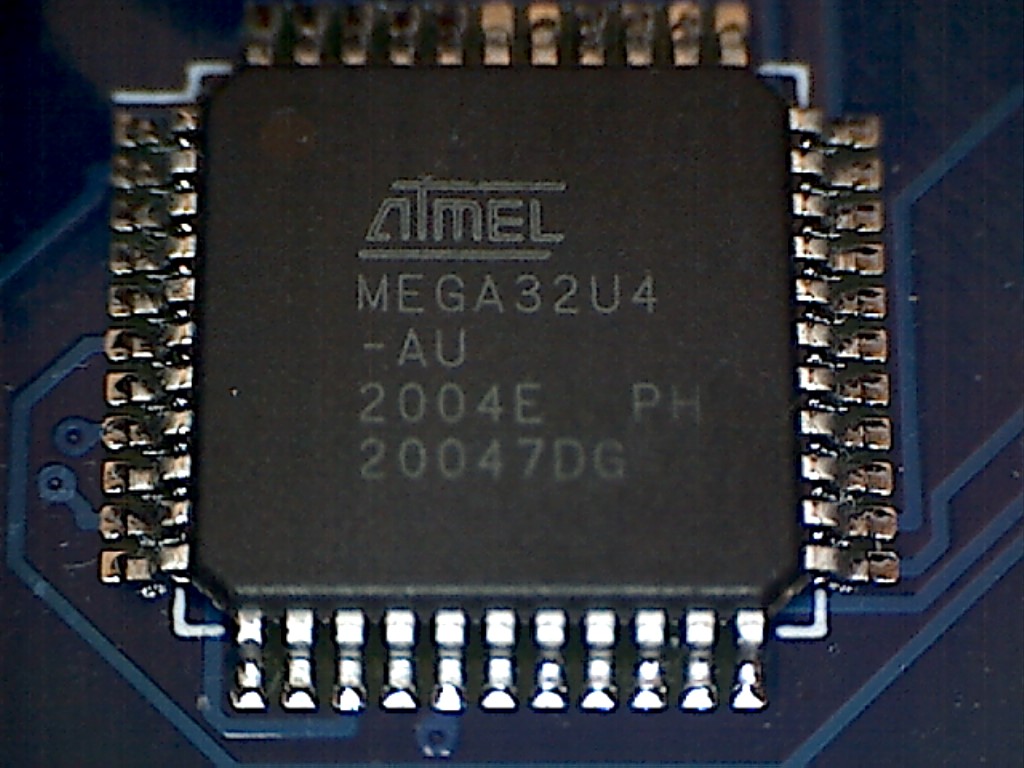
Figure 2: The Faunchpad’s microcontroller (view full size)
For a keyboard like the Faunchpad, our firmware is responsible for:
- Communicating with the connected computer via the USB HID (Human Interface Device) protocol.
- Detecting keypresses and emitting the corresponding characters via the USB connection.
These same functions are shared across pretty much all keyboards. To avoid rewriting this logic from scratch, we’ll use the QMK Firmware.
QMK isn’t really a firmware, it’s a framework for making firmware for mechanical keyboards. In the next section we’ll learn how to use QMK to compile a new version of the Faunchpad’s firmware.
Using QMK
Explaining how QMK works in detail is beyond the scope of this post. I’ll focus on presenting just what we need to customize the Faunchpad.
Check the QMK docs for a more detailed and comprehensive introduction to QMK itself.
Practically speaking, the QMK Firmware is a codebase with three main parts:
- A set of C libraries that provide a relatively high-level API for writing mechanical keyboard firmware.
- A collection of keyboard-specific firmware definitions (called “keymaps.“)
- A CLI tool for compiling keymaps and flashing them to connected devices.
To set up your development environment for QMK, follow the steps in QMK’s Getting Started page.
In that page, it recommends forking the QMK Firmware on Github and running qmk setup with our forked repository.
This is a good idea, but the main repo for QMK Firmware doesn’t actually have the Faunchpad keymaps, they’re just in the Gboards fork. So fork that fork and you’ll be good to go.
So, assuming you’ve followed the Getting Started, you should have the qmk CLI
ready to go. We’re ready to compile and flash our keymaps.
In fact, the Faunchpad is defined in two places, as qmk tells us:
$ qmk list-keyboards | grep faunchpad
faunchpad
gboards/k/faunchpad
Both versions have functionally identical keymaps, but the gboards/k/faunchpad
version takes advantage of g Heavy Industries’ custom engine code, including
using the QMK Combos library to implement multiple-key chords and combos. The
older faunchpad version is less well-abstracted.
So assuming we’ll be using the gboards/k/faunchpad version, we can configure
qmk to use that keyboard by default. This will cut down on typing in future
steps.
qmk config user.keyboard=gboards/k/faunchpadWe can also create our own keymap. Because the Faunchpad keymap has some Gboards
specific stuff, the qmk new-keymap command won’t give us all the boilerplate
we want. Instead, let’s just clone the default one:
cd keyboards/gboards/k/faunchpad

cp -r keymaps/default keymaps/mykeymap
Of course mykeymap is just a placeholder name; the keymap can be called
whatever we want.
To use this as our default keymap for qmk, we can run:
qmk config user.keymap=mykeymapThen we can compile with:
qmk compileThis step should produce a faunchpad_mykeymap.hex file in our current
directory. This is our firmware! (Sure, it’s exactly the same as the default
keymap, but it’s ours!)
Now we just need to get our firmware into the Faunchpad’s microcontroller. This process of writing the firmware to the device is called flashing.
(Once we discuss flashing, we’ll get back to talking about how to actually understand and change our new keymap.)
Flashing
Flashing is the process of writing our new firmware to the Faunchpad’s microcontroller.
In this case, we’ll use the existing USB connection to do our flashing, by taking advantage of a USB feature called USB DFU (Device Firmware Upgrade) mode.
However, the Faunchpad isn’t in this mode by default — it’s in USB HID (Human Interface Device) mode. So, to flash the Faunchpad over USB we have to get it to switch from “HID mode” to “DFU mode”.
The specific way to switch this behavior is device-dependent. For the Faunchpad (and the other Gboards), there’s a tiny hardware button to reset the device into DFU mode:
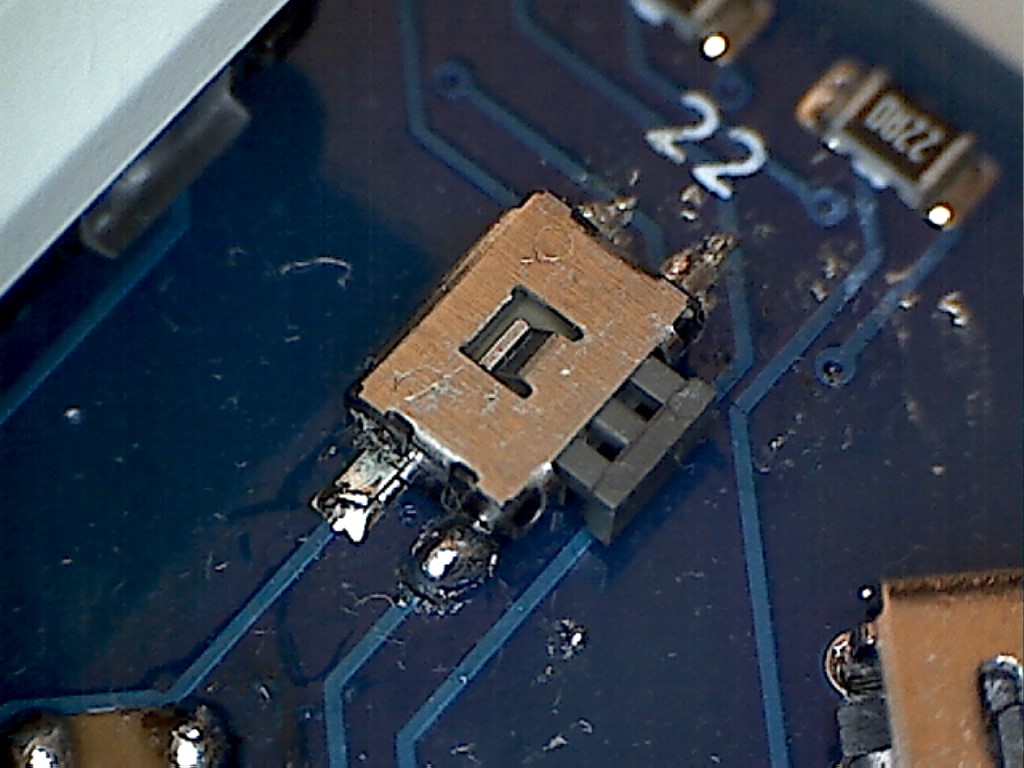
Figure 3: DFU mode button, zoomed in (view full size)
The button sits near the chip and the USB port:
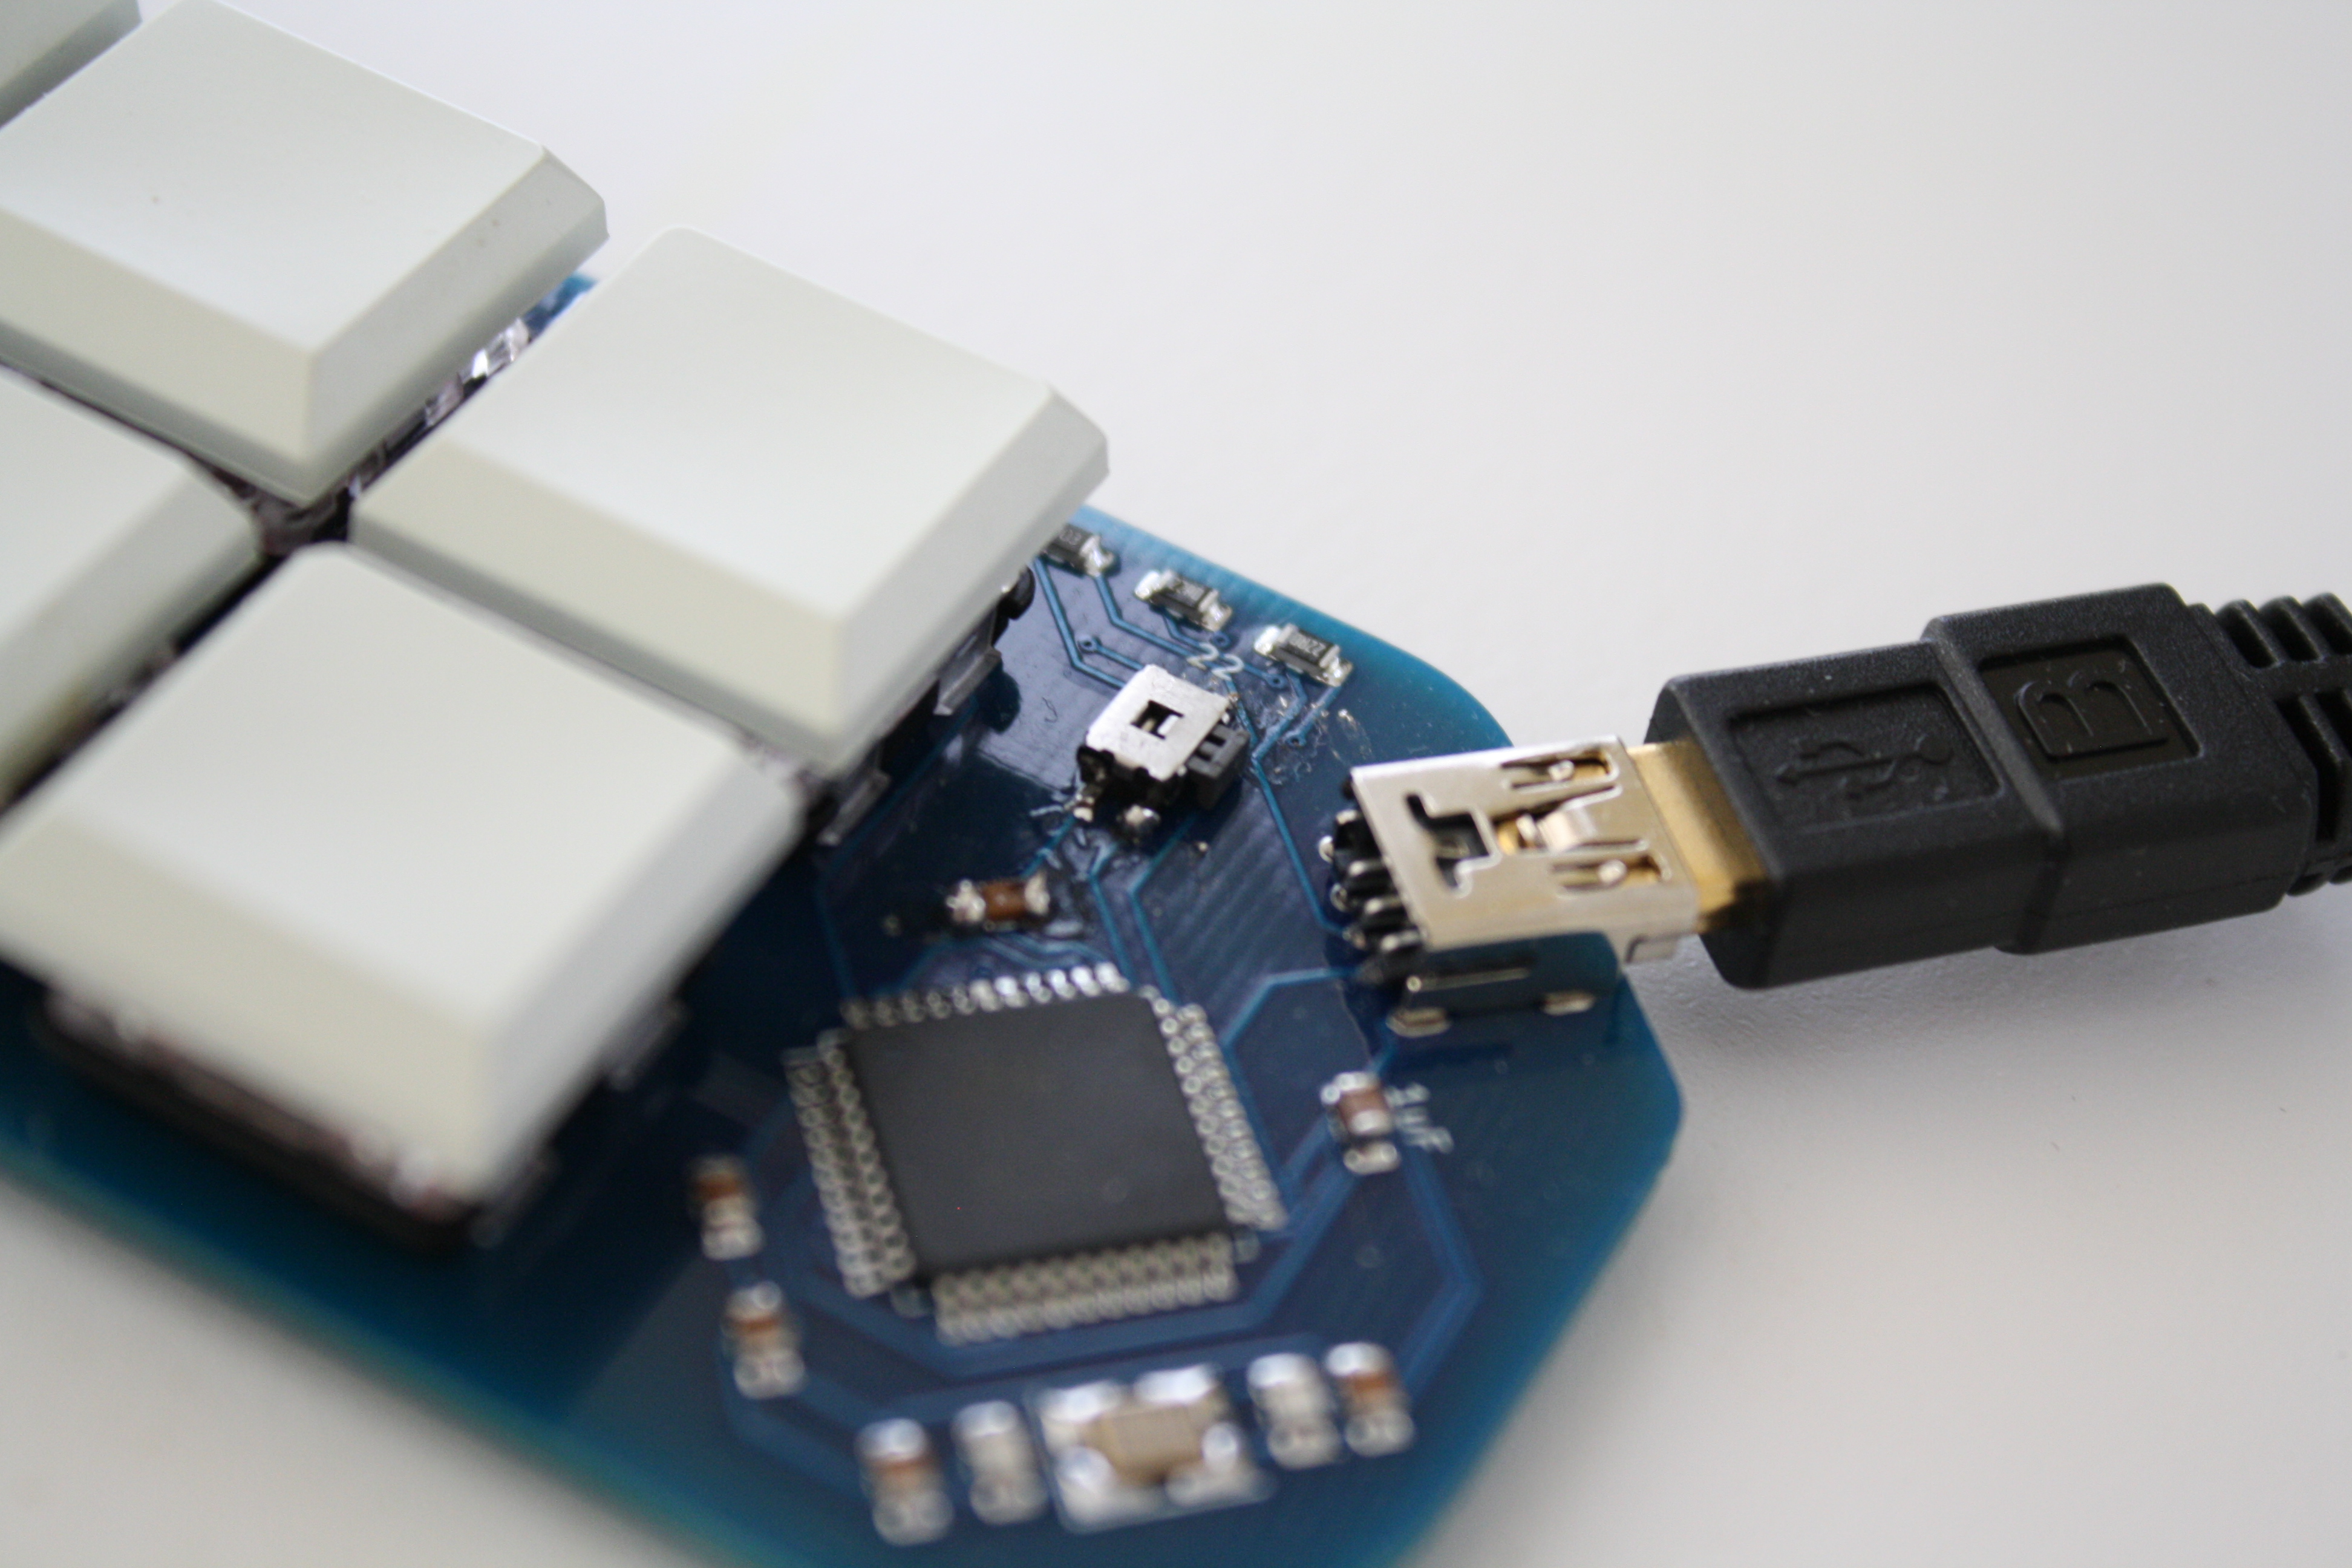
Figure 4: DFU mode button, less zoom (view full size)
When this button is pressed, the Faunchpad will appear to disconnect as a USB HID device, and reconnect as a USB DFU device.
Only one mode is active at once; when in DFU mode, the device no longer functions as a keyboard.
Remember how we mentioned that 4 KB of the ATmega32u4’s onboard program memory was reserved for a “USB bootloader?” This is why.
That 4 KB bootloader contains firmware for operating as an USB DFU device. Without that code, the Faunchpad would be un-reprogrammable, “stuck” in HID mode.
Once the device is in DFU mode and connected to our computer via the USB port, we can flash our keymap.
Remember that faunchpad_mykeymap.hex file we created earlier? That’s our
firmware. We could flash it directly, using a tool like QMK Toolbox or dfu-programmer.
Instead though, we’ll use qmk flash to compile and flash in a single step.
(Make sure you’ve put the Faunchpad in DFU mode first, or the following command won’t work!)
# note: uses the default keyboard and keymap we configured already
qmk flash -bl dfu
When finished, your Faunchpad will automatically return to HID mode, running your new firmware!
In this case we didn’t actually change the behavior, so all we’ll see is that the Faunchpad is operating exactly the same way it did before we pressed the DFU button.
Next, let’s dig into how we customize the behavior.
Customizing Keymaps
In QMK, keymaps define how the hardware signals from the keys should be interpreted and converted into characters.
In the Faunchpad case, things are complicated because we want to support chords (special behavior when multiple keys are pressed at once) and combos (special behavior when multiple keys are pressed in a certain order.)
For example, here’s a chord defined in our keymap (it’s in the file mykeymap/dicts/cats.def):
SUBS(FP01 | FP11, str_cat1, "https://tenor.com/ZrF5.gif")This says that when the user presses the FP01 and FP11 keys simultaneously,
it should output the string "https://tenor.com/ZrF5.gif". We’d call this a chorded macro.
The input keys on the Faunchpad are labeled from FP01 to FP14, a naming
convention we’ll continue to use.
The following image illustrates how the keys are laid out on the device:
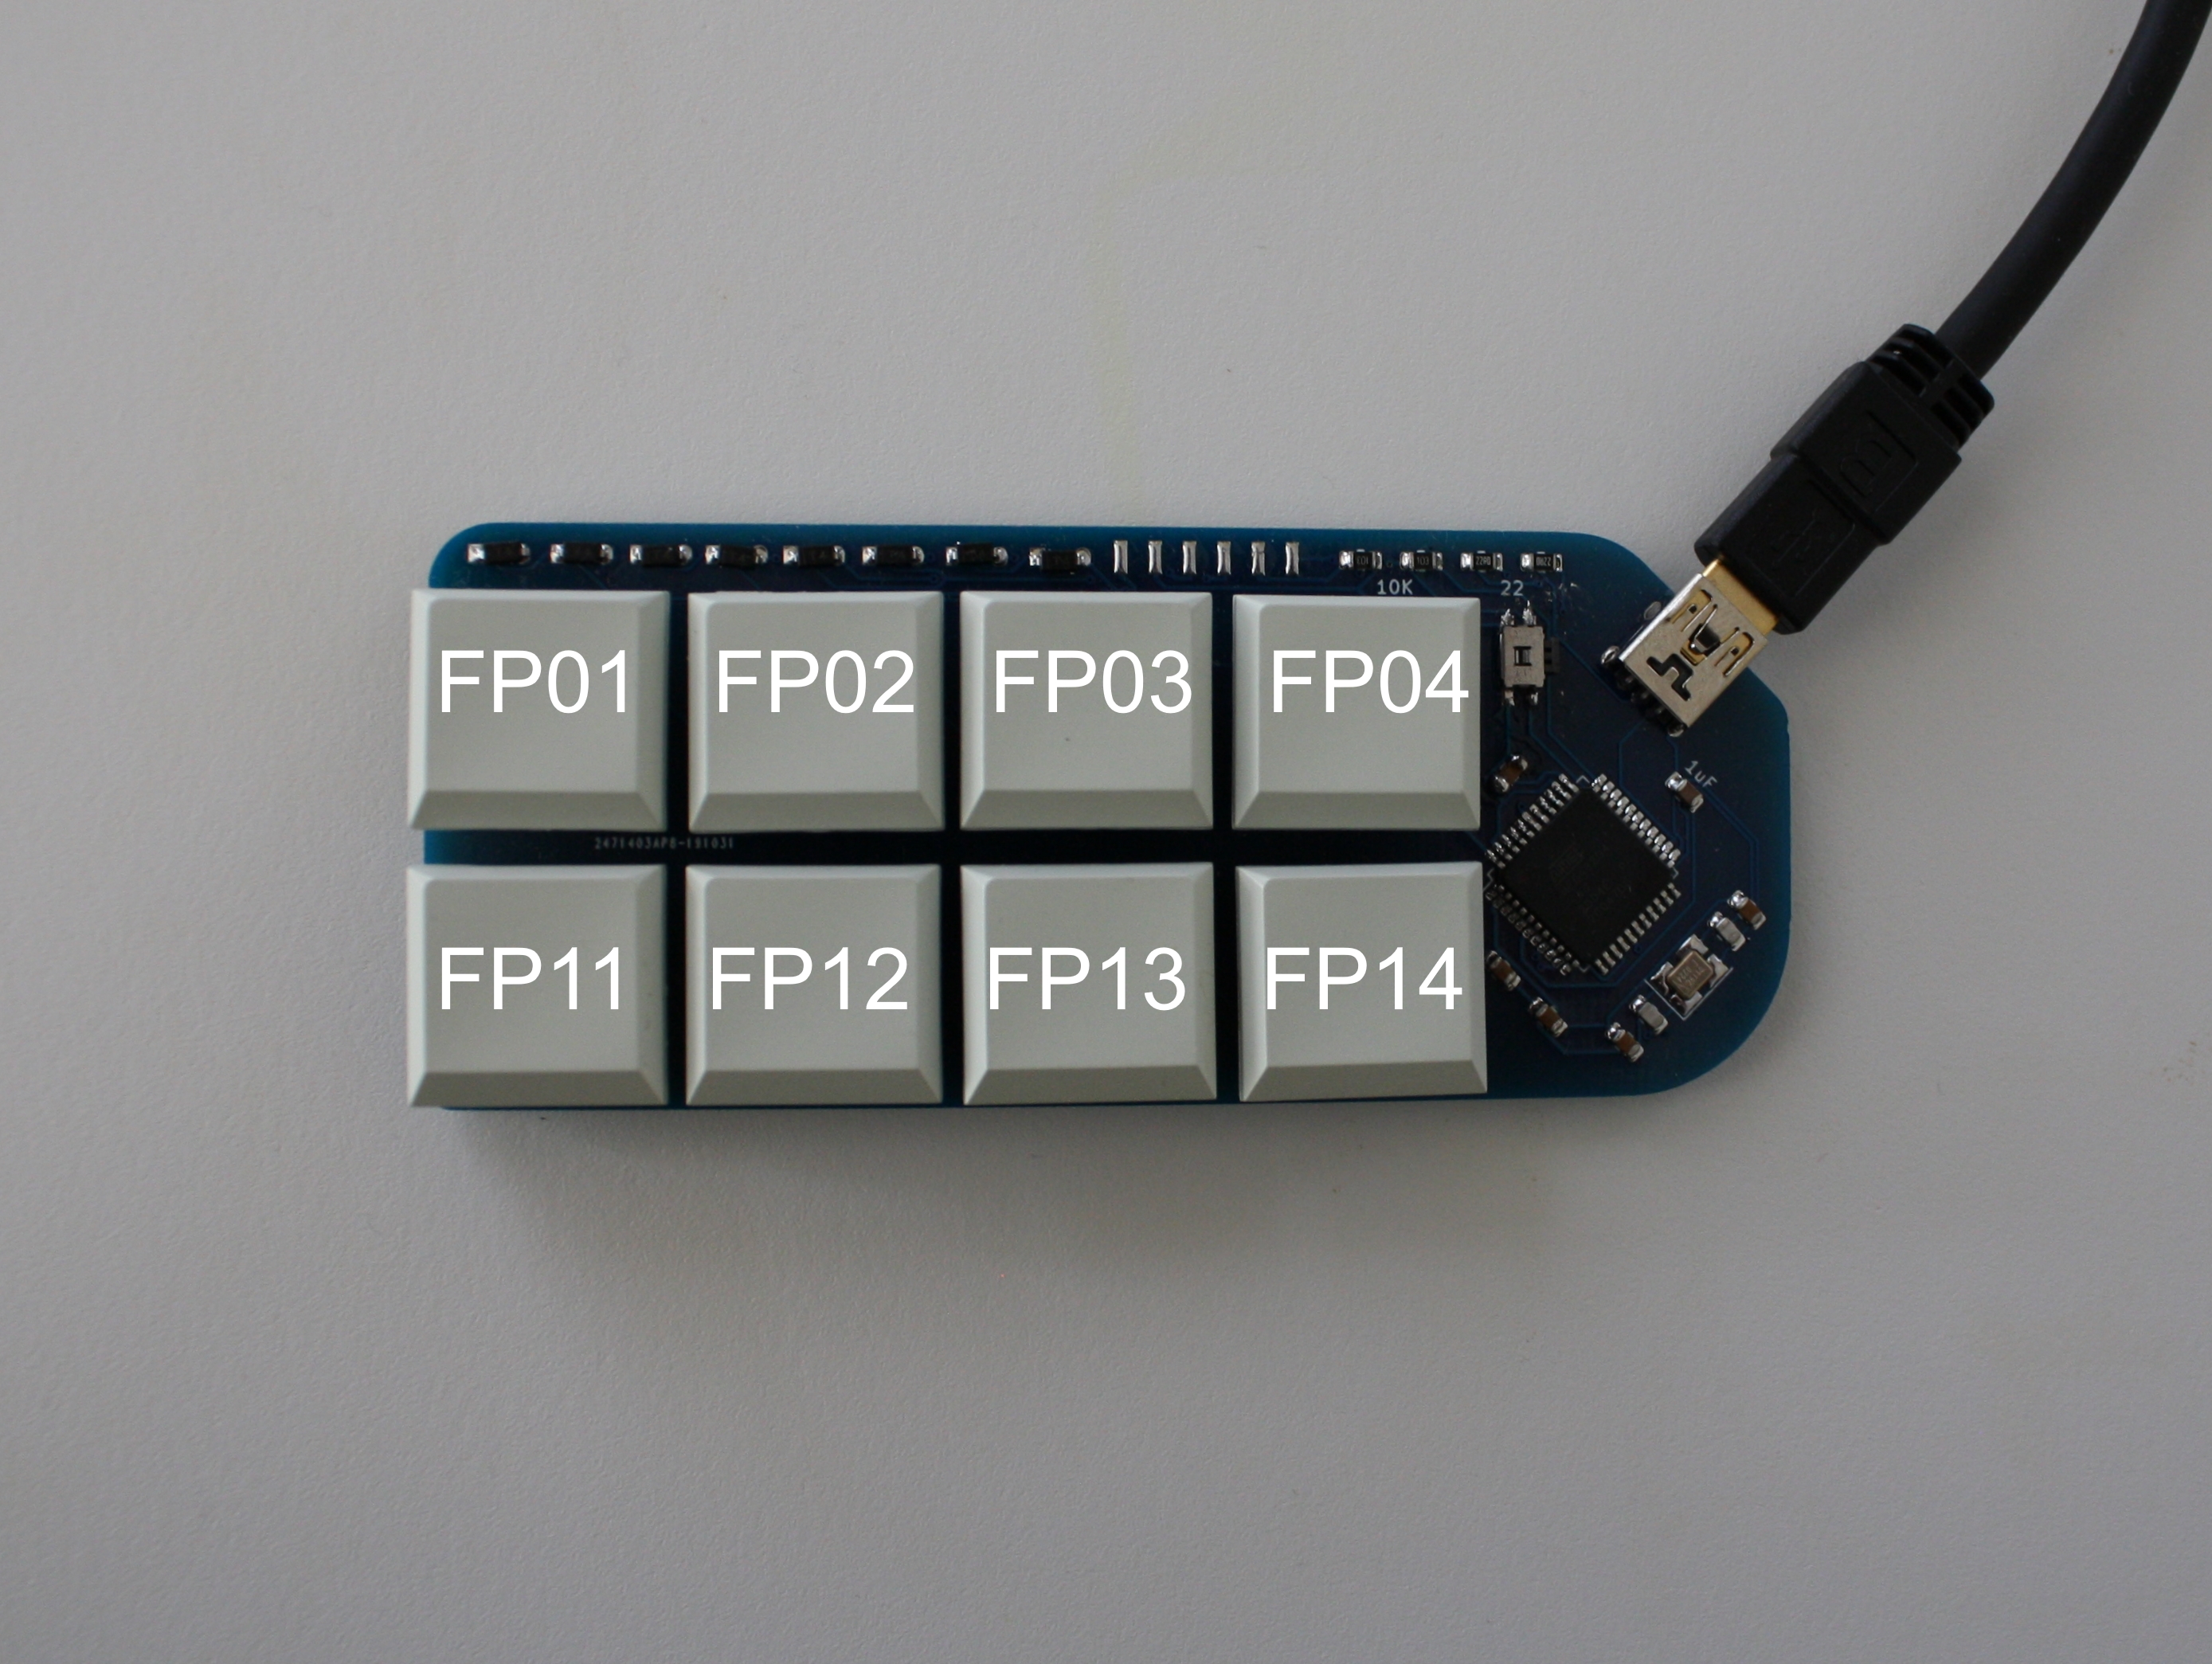
Figure 5: Faunchpad key reference (view full size)
Note that because we’re writing code that will be embedded into limited space,
we’re making heavy use of macros, like SUBS(), which implement “zero-cost”
abstractions (meaning they get “compiled away” and don’t increase the filesize
of our firmware beyond what’s strictly needed.)
Some of the macros we’ll use in .def files include:
PRES(keySequence, keyToSend)
: Intercepts the given keySequence and sends
a single QMK keycode.
KEYS(keySequence, keysToSend)
: Intercepts the given keySequence and sends
a series of QMK keystrokes.
SUBS(keySequence, ident, stringToSend)
: Intercepts the given keySequence
and sends the specified stringToSend using QMK’s SEND_STRING macro. (The
ident is used for code generation, and must be unique but doesn’t otherwise
matter.)
For full documentation of all the macros, check out the QMK Combos docs.
Anyway, to test our understanding, let’s make a low-effort change and see how it works. Look again at this line:
SUBS(FP01 | FP11, str_cat1, "https://tenor.com/ZrF5.gif")Let’s change that to:
SUBS(FP01 | FP11, str_cat1, "Hello World!")We should make sure we’re changing the mykeymap keymap, not the default keymap.
Changing the default keymap works fine, we just need to keep track of which we’re using so we flash the correct one.
Once changed, we can compile and flash with the same command as before:
qmk flash -bl dfuWe need to remember to push the button on our Faunchpad to make it enter DFU mode before we can flash it again.
Once the flashing is finished, we should be able to press FP01 and FP11 simultaneously and observe that instead of the original URL, the keyboard emits our new “Hello World!” text.
Congratulations — we’ve customized our Faunchpad’s behavior!
We didn’t make an especially useful change, but hopefully it’s given us a sense of where and how the Faunchpad is configured.
Now it’s up to you — what do you want your Faunchpad to do?
Footnotes
-
At time of writing, the g Heavy Industries website uses the same color scheme as this blog, and just looks similar in general. However, there is no relation between myself and g Heavy Industries, it’s just a coincidence. (The colors in question are from the Solarized color scheme, where I assume Germ got them as well. What can I say – they have good taste!) ↩
